
After years of crisscrossing borders with my Indonesian passport, I’ve picked up a few things about navigating the complex world of visa requirements. It’s not always straightforward, but with the right approach, you can avoid a lot of unnecessary headaches and focus on the excitement of your trip.
Understanding Visa-Free Travel for Indonesian Citizens
For me, visa-free travel is always the dream. It removes a significant layer of planning and cost, making spontaneous trips a real possibility. Over the years, I’ve seen the list fluctuate, but generally, Southeast Asia remains the easiest. Countries like Malaysia, Singapore, Thailand, Vietnam, and the Philippines consistently offer visa-free entry for Indonesians, usually for 30 days. This has been my go-to for quick getaways or unexpected long weekends. I usually just need my passport, proof of onward travel, and sometimes a hotel booking confirmation. It’s a fantastic baseline for any Indonesian traveler.
Key Visa-Free Destinations and Durations
I always keep a mental list of places I can just hop on a plane to. Here are some of the most reliable ones I’ve visited:
- ASEAN Countries: Most offer 30 days visa-free. This includes Singapore, Malaysia, Thailand, Vietnam, Laos, Cambodia, Myanmar, Brunei, and the Philippines. Each country has its own nuances, like proof of funds or specific entry cards, but the general rule is no visa needed.
- Hong Kong (SAR China): A solid 30 days visa-free. I’ve often used Hong Kong as a stopover and enjoyed its vibrant city life without any visa fuss.
- Morocco: Surprisingly, 90 days visa-free! This was a pleasant discovery on one of my longer trips. It’s an excellent option for extended exploration without the bureaucratic hurdles.
- Serbia: Another 30-day visa-free gem in Europe. I appreciated this flexibility when planning a multi-country Balkan trip.
Always Confirm Passport Validity
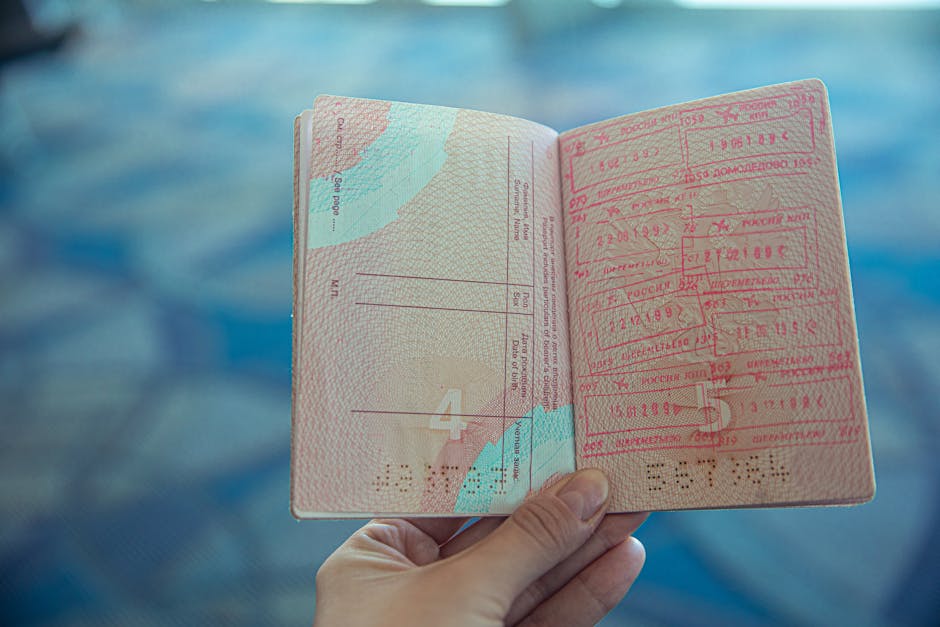
Even for visa-free travel, my first rule is always to check passport validity. Most countries, even those offering visa-free entry, require your passport to be valid for at least six months beyond your intended stay. I once almost got denied boarding for a trip to Singapore because I overlooked this detail; my passport was valid for five months and three weeks. It taught me a hard lesson: a few weeks can make all the difference. Don’t be like me; check that expiration date well in advance and renew if it’s cutting it close. A new Indonesian passport costs around IDR 350,000 for a standard 48-page one, so factor that in if you’re planning extensive travel.
Visa-on-Arrival (VOA) vs. Electronic Travel Authorization (ETA): My Take

When visa-free isn’t an option, I usually lean towards VOA or ETA. I much prefer an ETA. Why? Because you sort it out online before you even leave home. It means no queues at immigration and no worrying about having the exact local currency for the visa fee upon arrival. I’ve had friends stuck in long VOA lines after a 12-hour flight, and that’s just not how I want to start my vacation.
Comparing VOA and ETA Processes
Here’s how I generally see them stack up:
| Feature | Visa-on-Arrival (VOA) | Electronic Travel Authorization (ETA) |
|---|---|---|
| Application Method | At airport/border crossing | Online, pre-departure |
| Convenience | Can involve long queues, specific payment methods (cash often required), potential delays. | Apply from home, approval usually quick, smoother entry process. |
| Pre-approval | No pre-approval; decision made on arrival. | Pre-approved before travel; higher certainty of entry. |
| Example Countries | Indonesia (for many nationalities), Nepal, Maldives, Timor Leste. | Sri Lanka (ETA), Australia (ETA), Kenya (e-Visa functions like ETA). |
| Typical Cost | Varies widely, often $20-$50 USD. | Generally similar range, sometimes slightly higher for processing fees. |
My Preference: Why ETAs Win
I find ETAs like Australia’s eVisitor visa (subclass 651 for eligible passport holders, which sadly doesn’t include Indonesians, but serves as a great example of the *concept*) or Sri Lanka’s Electronic Travel Authorization to be far superior. While Indonesians need a traditional visa for Australia, many countries are adopting ETA-like systems for other nationalities. The point is, I always look for a pre-approved electronic option if visa-free isn’t available. For Sri Lanka, the ETA application is straightforward on their official immigration website, costing around $20 USD. You fill out the form, pay, and usually get approval within hours. It’s a seamless experience compared to landing after a red-eye flight and needing to fill out forms and wait in line, hoping you have the right foreign currency. Always check if a country offers an e-Visa or ETA before defaulting to VOA; it usually saves a headache.
The Annoying Truth About Schengen Visa Applications
Ah, the Schengen visa. This is where things can get truly frustrating for Indonesian travelers. I’ve been through the process multiple times for different purposes, and it’s never a walk in the park. The Schengen Area, ing 27 European countries like France, Germany, Italy, and the Netherlands, requires a uniform visa for short stays (up to 90 days in any 180-day period). My first tip: apply to the embassy of the country where you’ll spend the most time. If it’s equal, then the country of first entry. Sounds simple, but people mess this up, leading to unnecessary rejections.
Required Documents: A Mountain of Paperwork
The document list is extensive and non-negotiable. I always start gathering these about three months before my planned trip, just to be safe. You’ll need:
- Application Form: Filled out completely and accurately, signed.
- Passport: Valid for at least three months beyond your intended departure from the Schengen area, with at least two blank pages.
- Passport Photos: Recent, passport-sized, color photos meeting specific Schengen requirements (usually 3.5×4.5 cm, white background). I always go to a professional photo studio to avoid rejection.
- Flight Itinerary: Not a purchased ticket! A detailed flight reservation. I use a travel agent for this or look for refundable options.
- Hotel Bookings: Confirmed accommodation for your entire stay.
- Travel Insurance: Must cover medical expenses, hospitalization, and repatriation for at least EUR 30,000, valid throughout the Schengen Area. I’ve seen applications rejected for insufficient coverage.
- Proof of Funds: Bank statements for the last 3-6 months. This is critical. They want to see you can support yourself without working. I make sure my balance is consistently above their daily requirement (which varies but often around EUR 50-100 per day).
- Proof of Employment/Studies: An official letter from your employer stating your position, salary, and approved leave, or a student certificate. If you’re self-employed, business registration documents.
- Personal Covering Letter: Explaining your purpose of travel, itinerary, and commitment to return to Indonesia. I write this myself, keeping it concise and professional.
The Interview and Processing Times
Many embassies require an in-person interview, which adds another layer of stress. Dress neatly, be polite, and answer truthfully. They’re looking for genuine tourists, not potential overstayers. Processing times can vary from 15 days to up to 45 days, especially during peak seasons. I usually apply at least one to two months out, but ideally three months, to give myself ample buffer time. The fee for a short-stay Schengen visa is typically EUR 80, but always check the specific embassy website for current rates and any additional service charges from VFS Global or similar agencies.
Beyond the Tourist Visa: Work, Study, and Digital Nomad Options

While tourist visas are common, my travel has occasionally led me to explore longer-term stays for work or study. These are entirely different beasts from the short-stay tourist applications. They require significantly more documentation, often a deeper dive into your finances, educational background, or professional experience, and typically involve longer processing times. Don’t expect to wing these.
Student Visas: A Commitment
If you’re planning to study abroad, say in Japan or South Korea, you’ll need a student visa. This means acceptance from an accredited institution, proof of sufficient funds to cover tuition and living expenses (often for the entire duration of your course), and health insurance. I’ve helped friends through this, and the key is meticulous organization. Every document requested, from academic transcripts to financial guarantees, must be perfectly in order. The cost for a student visa to a country like Japan can be around IDR 400,000, but the real expense is the tuition and living costs.
Work Visas: Employer-Sponsored Paths
Work visas are almost always employer-sponsored. You generally can’t just apply for one without a job offer. Countries like the United States or the United Kingdom have highly structured work visa programs (e.g., H-1B for the US, Skilled Worker visa for the UK). The company hiring you usually initiates the process, proving they couldn’t find a local candidate. These visas are complex, expensive for the employer, and often involve interviews at the embassy. As an Indonesian, securing one requires highly specialized skills or an intra-company transfer.
The Rise of Digital Nomad Visas
This is a relatively new and exciting option I’ve been following closely. Countries like Portugal, Croatia, and Estonia now offer specific visas for remote workers. These usually require proof of income above a certain threshold (e.g., EUR 2,800/month for Portugal’s D8 visa), health insurance, and proof of remote employment. I’ve considered Portugal’s D8 visa myself; it offers a path to residency for those who can work independently. It’s a fantastic alternative to navigating tourist visa limits if you have a stable remote job and want to experience living abroad for an extended period.
My Top Tools for Checking Visa Rules (and Why They Beat Google)
Listen, don’t just Google "visa requirements for Indonesians to X country." I’ve learned that the hard way. Information on random travel blogs can be outdated, misleading, or just plain wrong. When it comes to something as critical as visa entry, you need reliable sources. Here are the tools I trust and use religiously.
The IATA Travel Centre (TIMATIC Database)
This is my gold standard. The IATA Travel Centre uses the same TIMATIC (Travel Information Manual Automatic) database that airlines use to determine if you can board a flight. If TIMATIC says you need a visa, the airline will deny you. Period. I always plug in my passport country (Indonesia), destination country, transit points, and dates. It gives real-time, official information on visa requirements, health regulations, and even passport validity rules. It’s incredibly comprehensive and saved me from potential issues more than once. It’s free to use for travelers, and honestly, it’s the best first step for any international trip planning.
Official Embassy and Consulate Websites
Once I’ve used IATA to get a general idea, I always, always, cross-reference with the official website of the destination country’s embassy or consulate in Indonesia. For example, if I’m going to Japan, I’d check the Embassy of Japan in Indonesia website. These sites have the most up-to-date forms, document lists, fees, and application procedures. This is also where you’ll find details on booking appointments, submission hours, and specific requirements that might not be in the general TIMATIC database. I’ve found that some nuances, like specific wording for invitation letters or types of bank statements, are only detailed on these official sites.
Direct Contact with Consular Services
If I’m still unsure, especially for complex cases or specific visa types, I don’t hesitate to email or call the consular section of the embassy. I’ve learned that sometimes, a quick, polite email asking for clarification on a specific document or a particular travel scenario can save weeks of confusion. Be prepared to wait a few days for a response, but it’s often worth it for peace of mind. I always include my nationality and specific travel purpose in my initial inquiry.
Common Pitfalls and How I Avoid Them
Through countless applications and border crossings, I’ve made my share of mistakes. But more importantly, I’ve learned to anticipate the common traps. Avoiding these makes the whole process smoother and reduces the chance of rejection.
-
Underestimating Processing Times: I learned early on to apply for visas much earlier than I think I need to. Don’t book your flight and then immediately try to get a visa for next month. Give yourself at least 6-8 weeks for most complex visas, and even more for peak travel seasons. I once cut it too close for a UK visa and had to pay for expedited processing, which was an unnecessary extra cost.
-
Incomplete or Incorrect Documentation: This is a huge one. Every single document they ask for must be provided, and it must meet their exact specifications. I’ve seen applications rejected because a bank statement wasn’t stamped, a photo was the wrong size, or a letter wasn’t on company letterhead. My strategy is to create a checklist from the official embassy website and tick off each item as I gather it. I even double-check it with a friend before submission.
-
Proof of Funds Issues: This is often a deal-breaker. Embassies want to see consistent financial stability, not just a sudden lump sum appearing in your account right before applying. I ensure my bank statements show regular income and expenses, and that my balance consistently covers the required daily amount for my trip duration. If someone else is sponsoring my trip, I make sure to include their detailed sponsorship letter and their bank statements, proving their ability and intent to cover my expenses.
-
Passport Validity and Blank Pages: As mentioned before, the six-month rule is non-negotiable for most countries. Also, don’t forget the blank pages! Many visas require a full page for the sticker. I’ve seen travelers turned away at the airport because they only had one blank page left when two were required. I always aim for at least four blank pages when my passport is nearing its renewal date.
-
Not Proving Ties to Indonesia: For tourist visas, especially to developed countries, embassies want assurance that you’ll return. My applications always include proof of employment (job letter, salary slips), property ownership, or family ties. If you’re a student, your student ID and enrollment letter are crucial. The stronger your ties, the more confident they are you’re not trying to overstay.
Is a Transit Visa Always Necessary? What I’ve Learned
This is a surprisingly common question, and one I’ve had to navigate myself. The short answer is: it depends, but don’t assume you’re exempt. I’ve learned to always check, even for short layovers. Getting caught without one can lead to being denied boarding or even deportation at the transit airport.
Understanding the Rules
For Indonesian passport holders, countries like the United Kingdom, the United States, and sometimes even the Schengen Area (depending on your specific itinerary and nationality requirements) often require a transit visa, even if you’re just staying inside the airport’s international transit area. This is called an Airport Transit Visa (ATV) or a Direct Airside Transit Visa (DATV). It’s a specific type of visa that allows you to pass through an international airport without actually entering the country.
My Experience with Transit Visas
I distinctly remember a trip where I was flying Jakarta to Dublin with a layover in London. I mistakenly thought because I wasn’t leaving Heathrow, I wouldn’t need a UK visa. Wrong. I needed a Direct Airside Transit Visa. Thankfully, I checked beforehand and applied for it, which was a separate, simpler process than a full tourist visa but still required an application and fee (around GBP 35). It saved me a massive headache. The rule of thumb I follow: if you’re transiting through a country that normally requires a visa for Indonesians, always check if a transit visa is needed, even if you don’t intend to clear immigration. Some countries offer exemptions if you have a visa for your final destination (like a US visa or Canadian visa), but these are specific and not universal. Always verify, verify, verify with IATA Travel Centre or the embassy.
Always verify the most current rules directly with the embassy or consulate before you even think about booking a flight.